
Some point in time, while using social platforms we think how this chat window works. It is pretty simple. Here is sample demo application which will show how the chat window works in Node.js.
We will be using the socket.io module for communication between chat windows. You can read about the ‘socket.io’ from https://socket.io/ .
PREREQUISITES
Node.js: It should be installed.
Express js: As it is a web application we will require the express module. if you want to read about express module and routing. you can click here.
Socket.io: It is one of the modules which used for bidirectional communication between the server and client. if you want to learn more on the socket, Please visit https://socket.io/docs/.
There is no fancy folder structure. All files are kept in one folder. It is a simple application to work on.
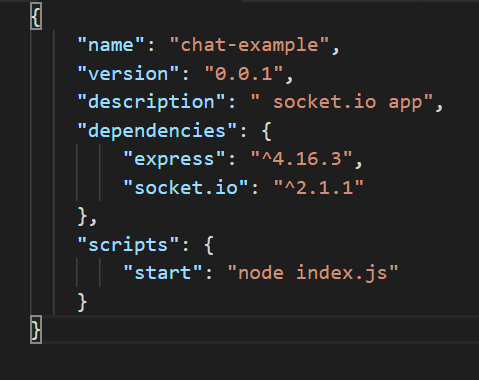
The content of package.json for this application
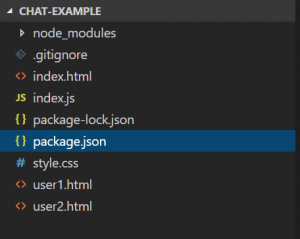
Application Folder
Application Description
This chat application contains two users. This application is a static one. You can see users are communicating with each other.
The welcome page will be to activate the user chat windows. Below is the code for activating the chat window (index.html).
<html lang="en">
<head>
    <meta charset="UTF-8">
    <meta name="viewport" content="width=device-width, initial-scale=1.0">
    <meta http-equiv="X-UA-Compatible" content="ie=edge">
    <link rel="stylesheet" href="https://maxcdn.bootstrapcdn.com/bootstrap/4.0.0/css/bootstrap.min.css">
    <link rel="stylesheet" href="https://cdnjs.cloudflare.com/ajax/libs/font-awesome/4.7.0/css/font-awesome.css">
    <link rel="stylesheet" href="style.css">
    <title>Chat</title>
    <style>
        button {
            width: 100px;
            padding: 7px;
            border-right: 7px;
            border-color: white;
            margin: 5px;
        }
    </style>
</head>
<body>
    <header>
        <div class=" container jumbotron">
            <center>
                <h1>Chat Application</h1>
            </center>
        </div>
    </header>
    <section>
        <div class="container">
            <center><button class="btn btn-primary" id=user1>User 1</button><button class="btn btn-primary" id=user2>User2</button></center>
        </div>
    </section>
    <script src="https://cdnjs.cloudflare.com/ajax/libs/jquery/3.3.1/jquery.slim.min.js"></script>
    <script src="https://cdnjs.cloudflare.com/ajax/libs/popper.js/1.13.0/umd/popper.min.js"></script>
    <script src="https://cdnjs.cloudflare.com/ajax/libs/twitter-bootstrap/4.0.0/js/bootstrap.min.js"></script>
    <script>
        jQuery(document).ready(function($) {
            $('#user1').click(function() {
                window.open('user1', 'chat window user1', 'height=650,width=400,toolbar=no,status=no')
            })
            $('#user2').click(function() {
                 window.open('user2', 'chat window user2', 'height=650,width=400,toolbar=no,status=no')
            })
        })
    </script>
</body>
</html>
To Handle the event generated from the client side, we have below code in server side,
var io = require('socket.io')(http);

//connecting to the chat active windows
io.on('connection', function(socket) {

    //capture and emit the emitted event from chat of user1
    socket.on('user1', function(msg) {
        io.emit('user1', 'Jim: ' + msg);
        io.emit('user2', 'Me: ' + msg);
    });

    //capture and emit the emitted event from chat of user2
    socket.on('user2', function(msg) {
        io.emit('user2', 'John: ' + msg);
        io.emit('user1', 'Me: ' + msg);
    });
});
Above code connects to the active chat windows using io.on(event: “connection”, listener: (socket: SocketIO.Socket)). In listner, we are passing socket object. On each socket event , we are emitting or routing the manipulated massage to each client using SocketIO.Server.emit(event: string, …args: any[])
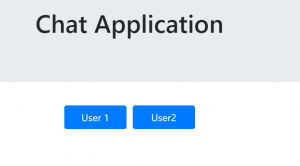
welcome page
When some click on any of the button, it will open up the window of the respective dummy user. For each dummy user, we have an HTML file and it’s routing in express. Below is the routings in index.js for the respective user.
app.get('/user1', function(req, res) {
    res.sendFile(__dirname + '/user1.html');
});


app.get('/user2', function(req, res) {
    res.sendFile(__dirname + '/user2.html');
});
HTML code for the user is very simple. It contains a different section like input form, chats message display, read and emit socket event section.
chat message display section would be like this
<section>
<div id="allmessage" class="container-fluid">
<ul id="listmessage"></ul>
</div>
</section>
JQuery code to append message after receiving from the server,
   socket.on('user2', function(message) {
                let name = message.split(':')[0];
                htmlmsg = '';
                if (name != 'Me') {
                    htmlmsg = '<p class=usertext>' + message + '</p>'
                } else {
                    htmlmsg = '<p>' + message + '</p>'
                }
                 $('#listmessage').append($('<li>').html(htmlmsg));
            });
Form for entering a message ,
<section><!--Enter the message here--></section>
<form action="">
<div class="form-group"><input id="user2" class="form-control" autocomplete="off" name="messageuser2" type="text" placeholder="" aria-describedby="helpId" /> <button id="sendmassage" class="btn btn-primary form-control" type="submit">Send</button></div>
</form>
We need to include the socket-io-client api in the browser to trigger the event.
<script src="/socket.io/socket.io.js"></script>
We need to add above code only. The version of the socket is handled by the server.
Jquery code to handle the form submit and trigger the socket event to the server,
   var socket = io();
            $('form').submit(function() {
                //emit event to server for user 1
                socket.emit('user1', $('#user2').val());
                //reset the form input value
                $('#user2').val('');
                return false;
            })
‘io’ is a global object which exposed to the server for connection. Here we are not passing any parameters to ‘io’. It will connect to the application from which the page is generated. If we want to connect to other application, we can pass the connection string in it.
‘Socket.emit’ is triggering specific events when it is called. Above code, it is generating ‘user1’ event and sending a message in this event.
Below is the full code of ‘user2.html’.
<!DOCTYPE html>
<html lang="en">
<head>
    <meta charset="UTF-8">
    <meta name="viewport" content="width=device-width, initial-scale=1.0">
    <meta http-equiv="X-UA-Compatible" content="ie=edge">
    <link rel="stylesheet" href="https://maxcdn.bootstrapcdn.com/bootstrap/4.0.0/css/bootstrap.min.css">
    <link rel="stylesheet" href="https://cdnjs.cloudflare.com/ajax/libs/font-awesome/4.7.0/css/font-awesome.css">
    <link rel="stylesheet" type="text/css" href="style.css">
    <title>chat window</title>
    <style>
    </style>
</head>
<body>
    <header>
        <div class="container-fluid">
            <center>
                <h1>Chat</h1>
            </center>
        </div>
    </header>
    <section>
        <div id=allmessage class="container-fluid">
            <ul id=listmessage>
            </ul>
        </div>
    </section>
    <section>
        <form action="">
            <div class="form-group">
                <input type="text" class="form-control" name="messageuser2" id="user2" autocomplete="off" aria-describedby="helpId" placeholder="">
                <button type="submit" class="btn btn-primary form-control" id=sendmassage>Send</button>
            </div>
        </form>
    </section>
    <script src="/socket.io/socket.io.js"></script>
    <script src="https://cdnjs.cloudflare.com/ajax/libs/jquery/3.3.1/jquery.slim.min.js"></script>
    <script src="https://cdnjs.cloudflare.com/ajax/libs/popper.js/1.13.0/umd/popper.min.js"></script>
    <script src="https://cdnjs.cloudflare.com/ajax/libs/twitter-bootstrap/4.0.0/js/bootstrap.min.js"></script>
    <script>
        $(function() {
            var socket = io();
            $('form').submit(function() {
                //emit event to server for user 1
                socket.emit('user1', $('#user2').val());
                //reset the form input value
                $('#user2').val('');
                return false;
            })
            //capture the event which is emitted from the server and display on the chat window
            socket.on('user2', function(message) {
                let name = message.split(':')[0];
                htmlmsg = '';
                if (name != 'Me') {
                    htmlmsg = '<p class=usertext>' + message + '</p>'
                } else {
                    htmlmsg = '<p>' + message + '</p>'
                }
                $('#listmessage').append($('<li>').html(htmlmsg));
            });
        })
    </script>
</body>
</html>
In the above section, we talked about event emitted by socket.io-client. To handle and work with the emitted event we have below server-side code.
var express = require('express');
var app = express()
var http = require('http').Server(app);
var io = require('socket.io')(http);


//connecting to the chat active windows
io.on('connection', function(socket) {

    //capture and emit the emitted event from chat of user1
    socket.on('user1', function(msg) {
        io.emit('user1', 'Jim: ' + msg);
        io.emit('user2', 'Me: ' + msg);
    });

    //capture and emit the emitted event from chat of user2
    socket.on('user2', function(msg) {
        io.emit('user2', 'John: ' + msg);
        io.emit('user1', 'Me: ' + msg);
    });
});
SocketIO.Server.on(event: “connection”, listener: (socket: SocketIO.Socket) i.e io.on(‘connection’,listener) in above code, We are connecting with all the active chat windows. SocketIO.Server.emit(event: string, …args: any[]) i.e io.emit(‘user1’,args) in above code, we are emitting the manipulated massages to respective client chat windows.
Below is the full index.js code,
var express = require('express');
var app = express()
var http = require('http').Server(app);
var io = require('socket.io')(http);
var port = process.env.PORT || 3000;

app.use(express.static("."));


app.get('/', function(req, res) {
    res.sendFile(__dirname + '/index.html');
});

app.get('/user1', function(req, res) {
    res.sendFile(__dirname + '/user1.html');
});


app.get('/user2', function(req, res) {
    res.sendFile(__dirname + '/user2.html');
});

//connecting to the chat active windows
io.on('connection', function(socket) {

    //capture and emit the emitted event from chat of user1
    socket.on('user1', function(msg) {
        io.emit('user1', 'Jim: ' + msg);
        io.emit('user2', 'Me: ' + msg);
    });

    //capture and emit the emitted event from chat of user2
    socket.on('user2', function(msg) {
        io.emit('user2', 'John: ' + msg);
        io.emit('user1', 'Me: ' + msg);
    });
});

//start the server on 3000 port
http.listen(port, function() {
    console.log('listening on *:' + port);
});
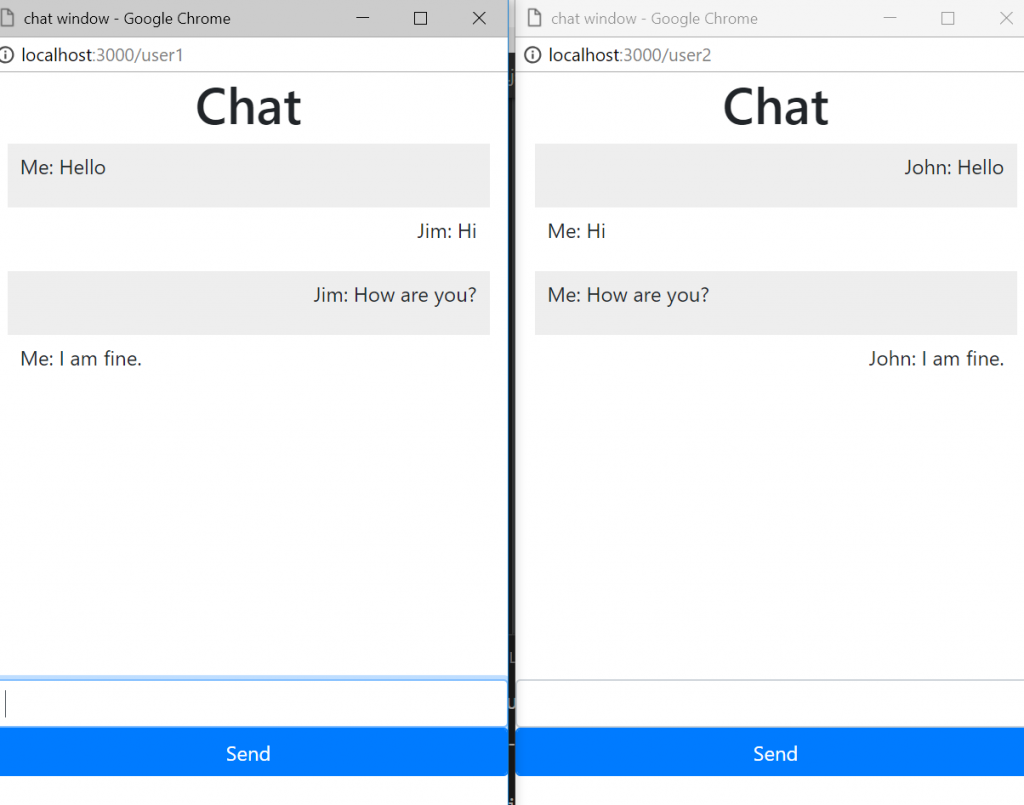
Sample conversation
Like this, you can create your own chat application or clone this application and enhance as per your imagination or requirements.
Below is the git repository location,
https://github.com/sahajahanAlli/chat-example
- Navigate to the folder(queue-example) using command prompt/windows powershell
- Type command “npm install”. It will install node modules.
- Type command “npm start”. It will show the output.
Please feel free to comments or provide the suggestion.