When designing a web application, we require some information need to be captured. It may be for future reference and analysis to find the root cause of some issue. Designing the Logging module intelligently will help these activities in future.
Here we will talk about simple custom logging technique, which you can use and customize as per your requirement of logging.
Prerequisites
Node Js: It should be installed in your system.
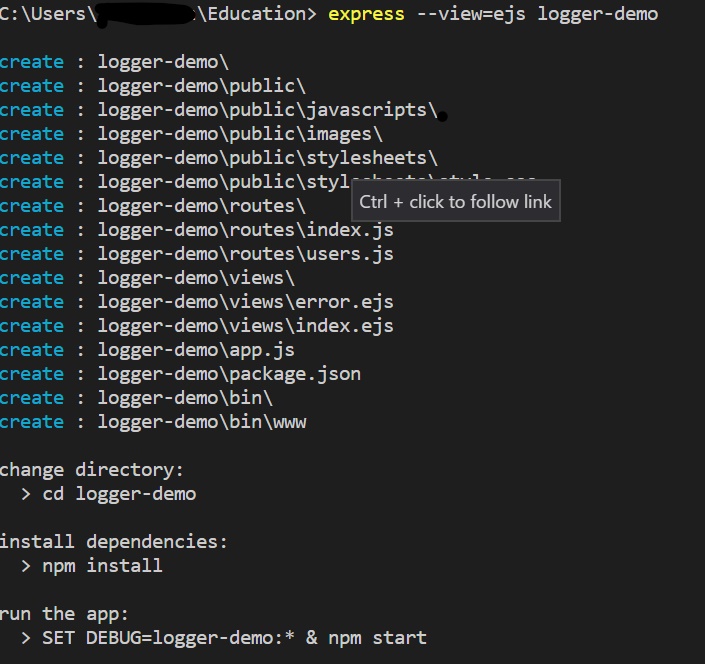
express-generator: You need to install express-generator, this will help you to create default folder structure using simple and guided steps. We are using ejs for the front-end. After installing express-generator, run the below command in the command line for creating a project. Also, follow the steps to install dependancies and run the app.
We need to install the body-parser module as well.
After completion of above activity, you will able to see the folder structure like what we have displayed in the image on the right side.
bin/www : This file contains the server connection and port details. If you want to run your app other than 3000. Please change the port number.
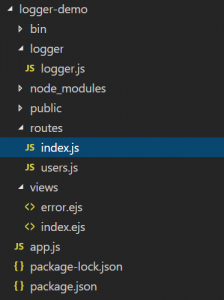
routes/index.js: This file contains all the express routing and views rendering details. We need to add file logging routing code in this file.
views/index.ejs: This file contains the front-end code. We will add login HTML code in this file.
app.js : It puts together all the routing, view, session etc and adds it to the node js app. We are just going to add body parser module in this application.
logger/logger.js: This file will contain custom logging class for our application.
Prepare frontend /HTML form
Let’s Start editing the file,
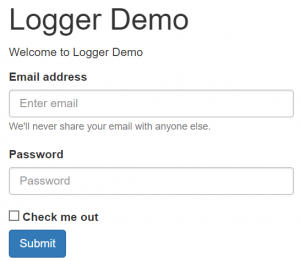
We will be editing the view/index.ejs file. We will be adding HTML form to provide the login credentials and submit it. The code is very simple. if you face any issue with ejs tags, please click on this Link.
We have a simple form which takes there like email address, password, check me out.
You can get full index.ejs code by clicking Here. Below is the code for HTML form,
<form action="/login" method="post"> <div class="form-group"><label for="exampleInputEmail1">Email address</label> <input id="InputEmail" class="form-control" name="InputEmail" type="email" placeholder="Enter email" aria-describedby="emailHelp" /> <small id="emailHelp" class="form-text text-muted">We'll never share your email with anyone else.</small></div> <div class="form-group"><label for="exampleInputPassword1">Password</label> <input id="Password1" class="form-control" name="Password1" type="password" placeholder="Password" /></div> <div class="form-check"><input id="Check1" class="form-check-input" name="Check1" type="checkbox" /> <label class="form-check-label" for="exampleCheck1">Check me out</label></div> <button class="btn btn-primary" type="submit">Submit</button> </form>
For bootstrap support, we need to add below piece of code in headers.
    <script src="https://ajax.googleapis.com/ajax/libs/jquery/3.3.1/jquery.min.js"></script>
    <script src="https://maxcdn.bootstrapcdn.com/bootstrap/3.3.7/js/bootstrap.min.js"></script>
Create logging module
We will create a logger class, which will contain a constructor method. We will have few more methods like log, error, verbose and info. You can create more methods as per your requirements.
log method will be used for a writing the message whatever message is passed to it, in a proper pattern which we defined in it. error method for error logging, info for logging information, verbose will be detail logging. All these three methods will call log for logging the message in a proper manner.
class logger{
    constructor(name){
        this.name=name
    }
    log(message) {
           console.log(`[${this.name}] ${message}`);
        }
    info(message) {
          this.log(`info: ${message}`);
         }
    verbose(message) {
           this.log(`verbose: ${message}`);
         }
    error(message){
        this.log(`error: ${message}`);
    }
}

module.exports=logger
update routing and app.js
Let start with updating routing, We have out index.ejs for the view and logger module ready. We need to update the routing so that we can bring them together.
Here we need to import the logger module that we have created to use it in our routing. We need to create an object of the logger class to access the methods of this class. We need to provide the logger name (web:1) like we have given in our application.
We have two routes one GET and POST. In GET, we are just rendering the view (index.js) to display a login form. In POST, we are capturing the values of form on submit. We have demonstrated the use of logger module in this by simple console print. Same way it can be implemented to write in a file and every routing as per the requirements.
var express = require('express');
const logger=require('../logger/logger')
var router = express.Router();

//create logger object
const log=new logger('web:1')

/* GET home page. */
router.get('/', function(req, res, next) {
  res.render('index', { title: 'Logger Demo' });
});

//on form submit
router.post('/login', function(req, res, next) {
  console.log('Logging info')
  console.log(log.info(new Date+JSON.stringify(req.body)))
  console.log('Logging error')
  console.log(log.error(new Date+JSON.stringify(req.body)))
  console.log('Logging log')
  console.log(log.log(new Date+JSON.stringify(req.body)))
  console.log('Logging verbose')
  console.log(log.verbose(new Date+JSON.stringify(req.headers)+JSON.stringify(req.body)))
  res.render('index', { title: 'Logger Demo' });
});

module.exports = router;
We need body-parser for capturing values from the form. For that need to install body-parser module nad include it in app.js. Below is the code to do that,
npm install --save bode-parser
var bodyParser=require('body-parser')
var app = express();

app.use(bodyParser.json());
app.use(bodyParser.urlencoded({ extended: false }));
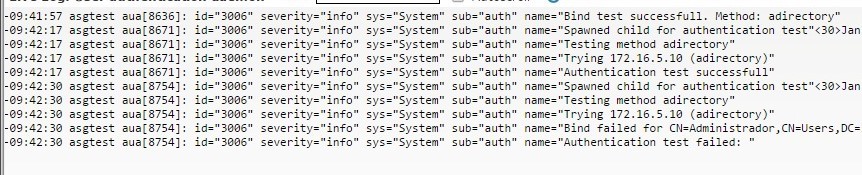
Below are the screenshot of view and logged console data

You can get the whole code from the Github repo. Below is the link:
https://github.com/sahajahanAlli/custome-logger
- Navigate to the folder(queue-example) using command prompt/windows powershell
- Type command “npm install”. It will install node modules.
- Type command “npm start”. It will show the output.
Please feel free to comments or provide the suggestion.