
Node Js File Uploader
In this rapidly changing world, we will get a different kind of requirements or demands to complete a certain activity. Sometimes we will get a requirement like an upload a text file or image or word file to the server.
To solve these kinds of requirement, we need a file uploader code to carry out the activity. Here in this tutorial, we will learn about the file uploader. This tutorial will offer you how to upload any kind of file to the server and create a backup of the previously uploaded file.
Prerequisites
Node Js: It should be installed in your system.
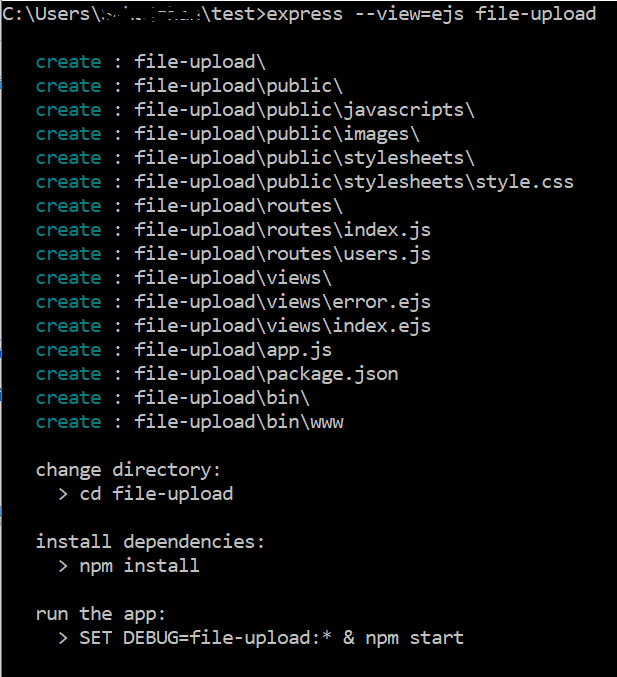
express-generator: You need to install express-generator, this will help you to create default folder structure using simple and guided steps. We are using ejs for the front-end. After installing express-generator, run the below command in the command line for creating a project. Also, follow the steps to install dependancies and run the app.
After completion of above activity, you will able to see the folder structure like what we have displayed in the image on the right side.
bin/www : This file contains the server connection and port details. If you want to run your app other than 3000. Please change the port number.
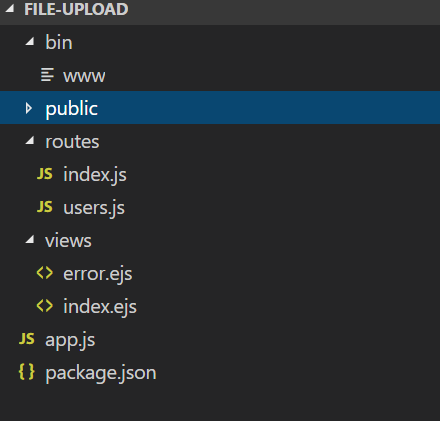
routes/index.js: This file contains all the express routing and views rendering details. We need to add file upload routing code in this file.
views/index.ejs: This file contains the front-end code. We need to put file upload HTML code in this file.
app.js : It puts together all the routing, view, session etc and adds it to the node js app. We are not going to make any changes to the file for this application.
Prepare frontend /HTML form
Here we will be editing the view/index.ejs file. We will be adding HTML form to the ejs file for browsing file and submission after browsing is done. The code is very simple. if you face any issue with ejs tags, please click on this Link.
You can get full index.ejs code by clicking Here. Below is the code for HTML form,
 <form class="form-inline" action="/" method=post encType="multipart/form-data">

        <div class="form-group">

            <input type="file" class="form-control-file" name="dataFile" id="dataFile" placeholder="Please browse the file location" aria-describedby="fileHelpId">

            <small id="fileHelpId" class="form-text text-muted"></small><br/>

            <button type="submit" class="btn btn-primary">Upload</button>

        </div>

    </form>
For handling alert, we have used below set of code in the script tag. We will receive an alert message after successful or unsuccessful attempt to upload a file to the server.
  let alert_message = '<%=message%>';

        console.log(alert_message)

        if ((alert_message != '')) {

            alert(alert_message)

        }
Update Router for file upload
In this section, we will be updating the code for routing file upload.
When the application will start, You can the routing service is attached to the application by app.js.
When we request for the page, it will open the HTML page which will ask for the browsing the file and on submits, it will pass data to respective function to save it to the server.
var express = require('express');
//importing the required module
const upload = require('../api/fileupload')

var router = express.Router();

/* GET home page. */
router.get('/', function(req, res, next) {

    res.render('index', { title: 'File Upload', message: '' });

});
// post-call after browsing the file location
router.post('/', upload.upload);
module.exports = router;
Saving file to server
We are using the “formidable” module for file saving to the server. On submission of the form, the request is passed to upload function through the router. Install formidable module by below command.
npm install --save formidable
Let’s create the file saving file. For that create a “api/fileupload.js” inside the main project directory.You can access the full code by clicking here
The below code creates an “upload” folder and pastes the uploaded file into the folder. It also takes back up of existing files.
For creating the folder if it doesn’t exist.
fs.exists(path.join(path.join(rootpath, requireddirctory)), exist => {
                    if (!exist) {
                        fs.mkdirSync(path.join(path.join(rootpath, requireddirctory)),
                            err => {
                                if (err) {
                                    console.log(err)
                                }
                                console.log('Folder is created successfully')
                            })
                    }
                })
For creating a backup of the file:
fs.rename(path.join(path.join(rootpath, requireddirctory), 'uploadedfile' + '.' + file_ext), path.join(path.join(rootpath, requireddirctory), 'uploadedfile_' + Math.floor(Math.random().toString() * 1000) + '.' + file_ext), function(err) {
                if (err) {
                    console.log(err)
                }
            })
Complete code for file save :
const fs = require('fs')
const path = require('path')

var uploadFile = {

    upload: function(req, res) {


        var formidable = require('formidable');
        var form = new formidable.IncomingForm();

        let requireddirctory = 'upload'

        form.parse(req, function(err, fields, files) {
            let dirpath = path.resolve(__dirname),
                indexpath = dirpath.lastIndexOf('\\') + 1,
                rootpath = dirpath.substr(0, indexpath);

            let initialPath = files.dataFile.path,
                file_ext = files.dataFile.name.split('.').pop(),
                index = initialPath.lastIndexOf('/') + 1,
                file_name = initialPath.substr(index),
                   final_path = path.join(path.join(rootpath, requireddirctory), 'uploadedfile' + '.' + file_ext);

                     fs.exists(path.join(path.join(rootpath, requireddirctory)), exist => {
                    if (!exist) {
                        fs.mkdirSync(path.join(path.join(rootpath, requireddirctory)),
                            err => {
                                if (err) {
                                    console.log(err)
                                }
                                console.log('Folder is created successfully')
                            })
                    }
                })
            fs.rename(path.join(path.join(rootpath, requireddirctory), 'uploadedfile' + '.' + file_ext), path.join(path.join(rootpath, requireddirctory), 'uploadedfile_' + Math.floor(Math.random().toString() * 1000) + '.' + file_ext), function(err) {
                if (err) {
                    console.log(err)
                }
            })
            fs.readFile(initialPath, function(err, data) {
                if (err) {
                    console.log(err)
                }
                fs.writeFile(final_path, data, function(err) {
                    if (err) {
                        console.log(err)
                    }
                    fs.unlink(initialPath,
                        function(err) {
                            if (err) {
                                res.status(500);
                                console.log('fail')
                                res.render('index', {
                                    title: 'File Upload',
                                    message: 'Unable to upload file'
                                });
                            } else {
                                res.status(200);
                                console.log('success')

                                res.render('index', {
                                    title: 'File Upload',
                                    message: 'file upload is successful'
                                });                            }
                        });
                });
            });
        });
    }
}

module.exports = uploadFile
You can get the whole code from the Github repo. Below is the link:
https://github.com/sahajahanAlli/file-upload
- Navigate to the folder(queue-example) using command prompt/windows powershell
- Type command “npm install”. It will install node modules.
- Type command “npm start”. It will show the output.
Please feel free to comments or provide the suggestion.